
UPDATE December 14th, 2018.
This tutorial has been updated to target Dokku version 0.12.13.
After reading this tutorial, you will be able to:
- Create your own server (droplet) on the cloud using the DigitalOcean cloud architecture. (I will also share with you a link that will give you $10 credit at DigitalOcean).
- Install your first DOKKU plugin. In this case, a Postgresql database plugin
- Automate your database migrations using the app.json manifest file
- Create a swap file to prevent memory issues when using the cheapest droplet type (1 GB)
- Setup zero downtime deployments using the CHECKS feature
- NEW: Remove unused containers to make sure there is always enough space on your droplet
I’ve tested each step of this tutorial multiple times so you should not run into any issues. If you do however, please leave me a comment at the end of this post and we will sort it out together!
Heroku has become the standard to host Ruby On Rails web applications. It is understandable because Heroku has such a great infrastructure. Deploying is a matter of typing “git push heroku master” and you’re pretty much done!
The thing is, if you are part of a small development team or you are a freelancer, the cost of using Heroku for all your clients / projects might become a real issue for you. This is where Dokku comes in! But what is Dokku?
The description on the Dokku home page is pretty self-explanatory:
The smallest PaaS implementation you’ve ever seen. Docker powered mini-Heroku in around 200 lines of Bash
So, there you have it. A “mini-heroku” that you can self-host or, better perhaps, use on an affordable cloud infrastructure such as DigitalOcean (use that previous link to get a $10 credit). Small teams and freelancers can now deploy like the pros at a fraction of the cost. Follow this tutorial and soon, you too, will be able to deploy your Rails apps simply by typing: git push dokku master. How neat is that? Sure you will have some configuring to do, but the overall process is not that complicated. This tutorial will show you how to get there.
Get your $10 credit here:

Are you ready for the tutorial…?

DigitalOcean
First, create the droplet on DigitalOcean.

Then you have to choose the size of the droplet. Let’s choose the cheapest option (Small teams and freelancers love cheap options. We’re broke!)
Choose your image! Don’t miss this step, it’s very important. Don’t choose a Rails preset or a Ubuntu image. Remember, we want Dokku!

Add your ssh key(s) for a more secure access to your droplet.

Then select the number of droplets to create and choose a hostname
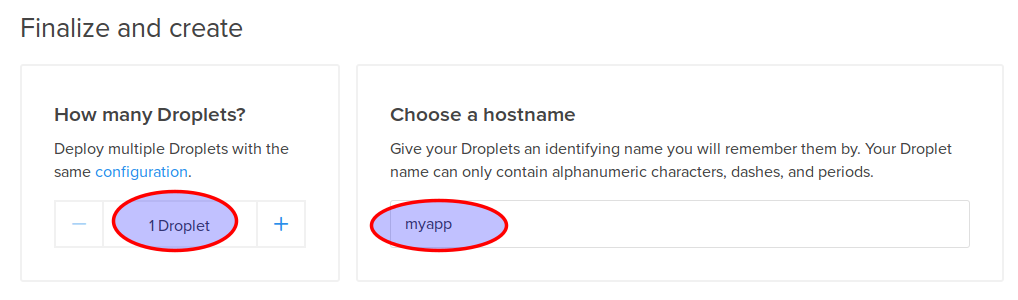
Finally, click on the “Create” button and wait until your droplet is fully created!
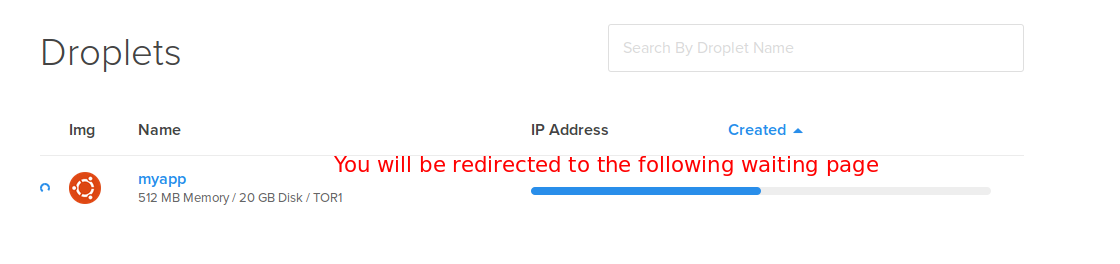
The DigitalOcean part is done. Now we have to make sure we can log in to our droplet
Connect to our droplet via SSH
Open a terminal window and connect to your droplet, like this:
ssh root@your-droplet-ip
Make sure the Dokku user can connect using your SSH key as well
When you will deploy your app with git, the “dokku” user will be used instead of root, so you need to make sure that this user can connect to your droplet. I’m not sure if this is supposed to be configured automatically when you create your droplet, but it didn’t work for me. Have a look at the file located in /home/dokku/.ssh/authorized_keys (on your droplet). If it’s empty like it was for me, run this command:
cat /root/.ssh/authorized_keys | sshcommand acl-add dokku dokku
Add a swap file!
Since we chose the cheapest option (1 GB), we might run into memory problems when we will deploy our Rails application. Rails assets compilation will make your deploy fail. Don’t worry though, your web application will still be running smoothly. What’s the solution if we are determined to use our cheap 1G droplet? Simple, we just add a swap file as explained in this StackOverflow answer. What follows is (almost) an exact copy of that answer.
To see if you have a swap files:
sudo swapon -s
No swap file shown? Check how much disk space space you have:
df
To create a swap file:
Step 1: Allocate a file for swap
sudo fallocate -l 2048m /mnt/swap_file.swap
Step 2: Change permission
sudo chmod 600 /mnt/swap_file.swap
Step 3: Format the file for swapping device
sudo mkswap /mnt/swap_file.swap
Step 4: Enable the swap
sudo swapon /mnt/swap_file.swap
Step 5: Make sure the swap is mounted when you Reboot. First, open fstab
sudo nano /etc/fstab
Finally, add entry in fstab (only if it wasn’t automatically added)
/mnt/swap_file.swap none swap sw 0 0
Great, now we have our swap file. What’s next?
Create our application in Dokku
If you type the dokku command, the list of commands for dokku will be displayed on the screen. You should study it as it is very instructive, but for now we will simply use the dokku apps:create command to create our application.
dokku apps:create myapp
This will create a container for your new app.
Database? Sure, let’s use Postgres
To interact with a postgres database on Dokku, you need to use a plugin. Update december 2018: I’ve now changed the postgres plugin I use since the old one does not appear to be in active development anymore.
dokku plugin:install https://github.com/dokku/dokku-postgres.git postgres
Once it’s installed, feel free to type dokku postgres to see all available commands. Let’s create our database:
dokku postgres:create myapp
A new service called myapp has now been created. The next step is to link it to our application which happens to have the same name.
dokku postgres:link myapp myapp
Done! If you look at the output of this command, you will notice that an environment variable called DATABASE_URL has been configured. This will be your connection string to access your postgres database from your Rails app.
Speaking of environment variables…
Thanks to Ariff in the comments for asking questions about environment variables. The following section is a recap of what was discussed in the comments.
To configure a new environment variable for a given application, you do the following:
dokku config:set myapp SOME_SECRET_VAR='hello'
Note that you don’t have to manually set the SECRET_KEY_BASE environment variable which is used in the secrets.yml file of your Rails application. This is because the ruby buildpack already does this for you. As you can see in the source code, SECRET_KEY_BASE is set to a randomly generated key (have a look at the setup_profiled and app_secret methods).
Create our Rails app locally
Switch to your local workstation and create a new rails app.
  rails new myapp
  cd myapp
  git init .
Add a git remote to your Dokku application
git remote add dokku dokku@your-droplet-ip:myapp
Open your database.yml and add your Dokku environment variable:
#...
production:
  adapter: postgresql
  url: <%= ENV['DATABASE_URL'] %> #This is the environment variable created by our Dokku command earlier
  encoding: unicode
  pool: 5
Off topic: Why not take this opportunity to use environment variables for all your secrets?
As for the Gemfile, make sure it has the following lines:
ruby '2.5.1' #or any other ruby version
gem 'rails_12factor', group: :production #rails library tuned to run smoothly on Heroku/Dokku cloud infrastructures
gem 'pg' #postgres gem
#...
We will also create a default controller to have somewhat of a functioning application. On your local worstation, run:
./bin/rails g controller static_pages
Create a new file named home.html.erb in app/views/static_pages and add the following:
<p>Hello world!</p>
In routes.rb, add:
root 'static_pages#home'
Are you ready? Run bundle install, commit everything then type:
git push dokku master
If you did everything correctly, you should see something like this after you pushed to dokku.(I edited the output to keep it brief).
-----> Discovering process types
 Default types for -> worker, rake, console, web
-----> Releasing myapp (dokku/myapp:latest)...
-----> Deploying myapp (dokku/myapp:latest)...
-----> Attempting to run scripts.dokku.predeploy from app.json (if defined)
-----> App Procfile file found (/home/dokku/myapp/DOKKU_PROCFILE)
-----> DOKKU_SCALE file found (/home/dokku/myapp/DOKKU_SCALE)
=====> console=0
=====> rake=0
=====> web=1
=====> worker=0
-----> Attempting pre-flight checks
 For more efficient zero downtime deployments, create a file CHECKS.
 See http://dokku.viewdocs.io/dokku/deployment/zero-downtime-deploys/ for examples
 CHECKS file not found in container: Running simple container check...
-----> Waiting for 10 seconds ...
-----> Default container check successful!
-----> Running post-deploy
-----> Configuring myapp.myapp...(using built-in template)
-----> Creating http nginx.conf
-----> Running nginx-pre-reload
 Reloading nginx
-----> Setting config vars
 DOKKU_APP_RESTORE: 1
-----> Found previous container(s) (3594ff49f81c) named myapp.web.1
=====> Renaming container (3594ff49f81c) myapp.web.1 to myapp.web.1.1544803301
=====> Renaming container (40f628df49af) quizzical_raman to myapp.web.1
-----> Attempting to run scripts.dokku.postdeploy from app.json (if defined)
-----> Shutting down old containers in 60 seconds
=====> 3594ff49f81c171fefe56bca68742d98cde2cd18d5111b28d4ea32ed5e59afe9
=====> Application deployed:
 http://myapp.myapp
Obviously if you type myapp.myapp in the browser, it will not work. What you have to now is to point a domain to your new droplet.
Configuring a domain
If you don’t have any top level domain, the fastest way would be to add a subdomain record for one of a domain that you own. Then have it point to your droplet IP.
Once you’ve done that, run the following command on your dokku droplet
dokku domains:add myapp example.yourdomain.com
Open a browser and type example.yourdomain.com. You should see an ugly “Hello World!”, congratulations!
Configure pre-flight checks
Something might have caught your attention when we deployed our application:
-----> Running pre-flight checks
       For more efficient zero downtime deployments, create a file CHECKS.
       See http://progrium.viewdocs.io/dokku/checks-examples.md for examples
       CHECKS file not found in container: Running simple container check...
Checks in Dokku are a way to setup zero downtime deployments. You don’t want your users to get an error page while your server is restarting. Since we have not created any custom check, dokku run a default check that simply make sure that the new container is up and running before pointing to the new app. The problem is it will not check if puma has been fully loaded. Let’s create a super simple check to make sure our Rails application is available.
At the root of your app, create a file named CHECKS and add the following:
WAIT=8 #Wait 8 seconds before each attempt
ATTEMPTS=6 #Try 6 times, if it still doesn't work, the deploy has failed and the old container (app) will be kept
/check_deploy deploy_successful
Important: Leave an empty line at the end of this file, otherwise Dokku might not detect your check. Is this a bug? I don’t know… but it took me a while to figure this one out!
Now create a file called check_deploy in your rails public directory and add the text:
deploy_successful
In other words, dokku will try 6 times to obtain the “deploy_successful” string after calling “/check_deploy”.
Push everything to dokku and verify the output. You will probably see something like that:
-----> Running pre-flight checks
-----> Attempt 1/6 Waiting for 8 seconds ...
       CHECKS expected result:
       http://localhost/check_deploy => "deploy_successful"
-----> All checks successful!
Database migrations
Before Dokku 0.5, it was not really possible to have your database migrations run automatically on deploy. You had to do it in two steps. First you deploy, then you migrate by typing: ssh root@your-domain dokku run myapp rake db:migrate
Fortunately, we can automate the process now that Dokku supports the app.json manifest file. Create a app.json file in the root of your repository and add this:
{
  "name": "myapp",
  "description": "Dummy app to go along the dokku tutorial found on rubyfleebie.com",
  "keywords": [
    "dokku",
    "rails",
    "rubyfleebie.com"
  ],
  "scripts": {
    "dokku": {
      "postdeploy": "bundle exec rake db:migrate"
    }
  }
}
Let’s create a dummy model to see if the migrations will be run.
./bin/rails g model Book

You can then migrate your database in development if you want. Once it done, commit and push to dokku. the output should look like this:
-----> Running post-deploy
-----> Attempting to run scripts.dokku.postdeploy from app.json (if defined)
-----> Running 'rake db:migrate' in app container
       restoring installation cache...
       Migrating to CreateBooks (20160405194531)
       == 20160405194531 CreateBooks: migrating ======================================
       -- create_table(:books)
          -> 0.0139s
       == 20160405194531 CreateBooks: migrated (0.0142s) ==========
How cool is that? I hoped you enjoyed this tutorial. Your comments are appreciated!
Ready to use in production? Make sure to clear old and unused containers from time to time!
If you want to use Dokku in production, make sure to remove containers no longer in use, because the underlying Docker platform WILL NOT automatically delete them for you. If you don’t, the space on your droplet will grow and will ultimately crashes your app! Fortunately, in newer docker versions, pruning old containers is very easy, simply run the following command once in a while:
docker container prune
If you are using an older version of Docker and the prune command above does not exist, there is another way to clear unused containers. Have a look at this SO answer.
Troubleshooting
Dushyant in the comments had some errors on deploy. He found out that his problem was related to the numbers of containers configured when using DigitalOcean 5$ plan. I didn’t run into this problem myself, so here is what Dushyant says about it:
« Finally I found the solution. My previous solution got me working but ultimately that wasn’t the true solution.
It is happening because of containers and because of 5 dollar plan.
You can get the list of containers by this command
docker ps
Then remove the unwanted containers
docker rm -f docker_id »
What’s next?
How about automating your database backups and storing them on a zero-knowledge cloud architecture?